
Automate dispensers and wealth clock
Fruits, glue, tickets, and other buffs come from dispensers you visit on cooldown timers. Wealth Clock is the most essential dispenser and can give up to about 120 tickets a day. Revolution Macro collects from the dispensers you enable as soon as they become available. This guide will walk you through setting it up.
Before you start
Section titled “Before you start”- You can find fruit and pass dispensers at Collect → Dispensers on the Fruits and Passes tabs.
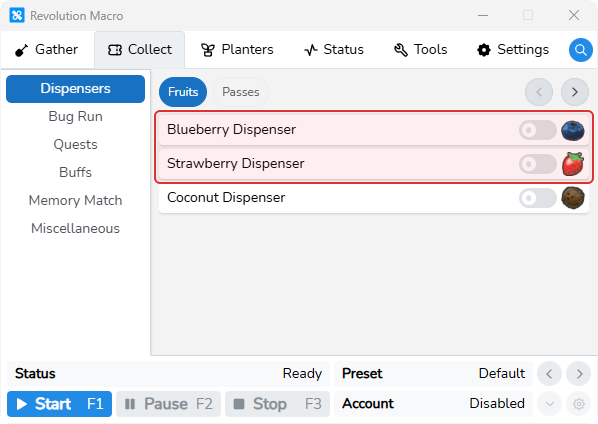
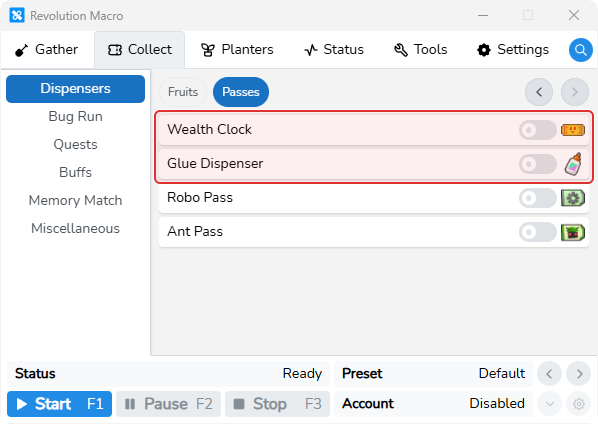
- A typical setup turns on Blueberry Dispenser and Strawberry Dispenser under Fruits, plus Wealth Clock and Glue Dispenser under Passes.
- Wealth Clock should always be on. It waits until about one hour after you join the server before the first trip, then about every hour after that.
- Honeystorm and Sticker Printer are under Collect → Miscellaneous. Memory Match and Beesmas collectables have their own pages.
-
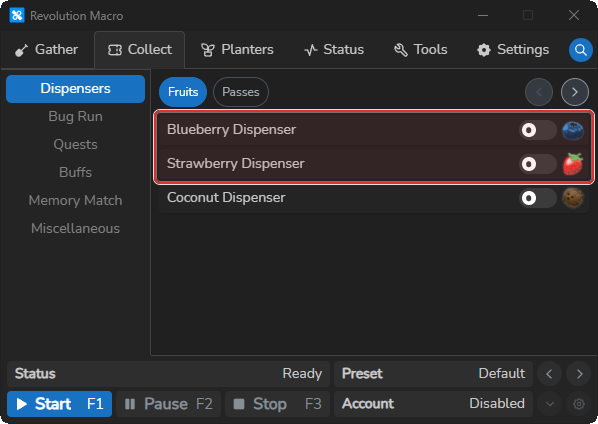
Open Collect → Dispensers → Fruits. You see Blueberry Dispenser, Strawberry Dispenser, and Coconut Dispenser switches.
-
Turn on Blueberry Dispenser and Strawberry Dispenser. Leave Coconut Dispenser off unless you want coconut fruit on the same schedule.
-
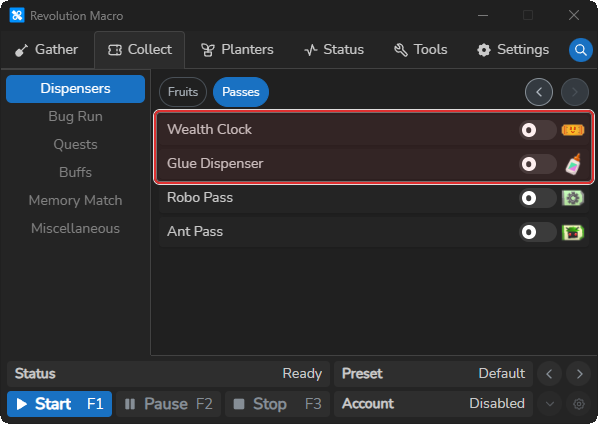
Open Collect → Dispensers → Passes. You see Wealth Clock, Glue Dispenser, Robo Pass, and Ant Pass switches.
-
Turn on Wealth Clock and Glue Dispenser. Leave Robo Pass and Ant Pass off unless you need those passes from the dispensers.
-
Start the macro and leave it running. Status can show
Collecting: …, thenCollected From: …when a dispenser runs.
Wealth Clock timing
Section titled “Wealth Clock timing”Wealth Clock does not run immediately on join. After you start the macro, wait about one hour in the server before the first Wealth Clock trip. After that, Wealth Clock can run again about every hour since the last collection.
Honeystorm (optional)
Section titled “Honeystorm (optional)”-
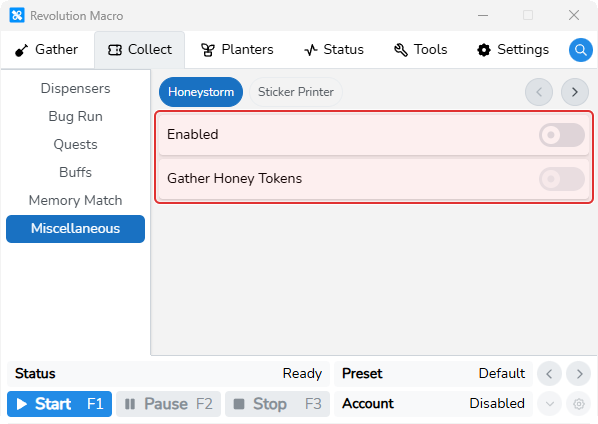
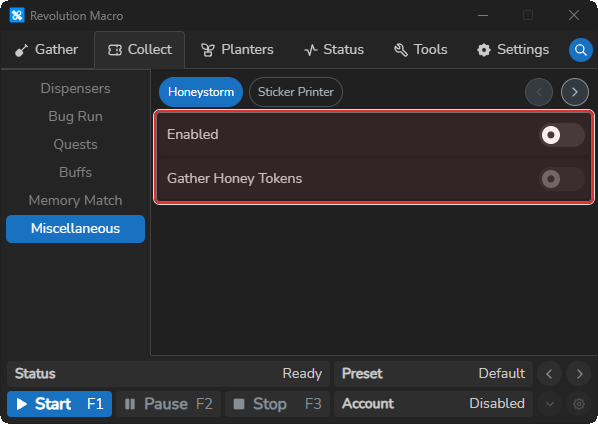
Open Collect → Miscellaneous → Honeystorm. You see Enabled and Gather Honey Tokens.
-
Turn on Enabled. Gather Honey Tokens becomes clickable.
-
Optionally turn on Gather Honey Tokens if you want the macro to pick up storm tokens after Honey Storm runs. Leave it off if you only want the summon.
More settings
Section titled “More settings”Blueberry Dispenser
Section titled “Blueberry Dispenser”When on, the macro schedules Blueberry Dispenser collection about every 4 hours. Turn on for typical fruit collection.
Strawberry Dispenser
Section titled “Strawberry Dispenser”When on, the macro schedules Strawberry Dispenser collection about every 4 hours. Turn on for typical fruit collection.
Coconut Dispenser
Section titled “Coconut Dispenser”When on, the macro schedules Coconut Dispenser collection about every 4 hours. Leave off unless you want coconut fruit on the same timer as the other fruit dispensers.
Wealth Clock
Section titled “Wealth Clock”When on, the macro collects Wealth Clock after about one hour in the server, then about every hour. Wealth Clock is the most essential dispenser that you should have enabled by default — it can give up to about 120 tickets a day.
Glue Dispenser
Section titled “Glue Dispenser”When on, the macro schedules Glue collection about every 22 hours and uses gumdrops when available to reach the dispenser. Glue Dispenser is worth leaving on — it is free glue.
Robo Pass
Section titled “Robo Pass”When on, the macro schedules Robo Pass collection about every 22 hours. Turn on when you want free Robo Passes from the dispenser and you are not already at max stacks.
Ant Pass
Section titled “Ant Pass”When on, the macro schedules Ant Pass collection about every 2 hours. If max passes are detected, Status shows Max Passes Detected and Ant Pass collection disables for the rest of the session. Turn on when you need free Ant Passes from the dispenser.
Honeystorm
Section titled “Honeystorm”Enabled schedules Honey Storm about every 4 hours. Gather Honey Tokens collects storm tokens afterward when on and requires Enabled first.
Sticker Printer
Section titled “Sticker Printer”Enabled schedules Sticker Printer about every 1 hour. Egg Type chooses Basic, Silver, Gold, Diamond, or Mythic when confirming print. Leave Egg Type at Basic unless you want a different egg tier.
Beesmas and Memory Match
Section titled “Beesmas and Memory Match”Seasonal Beesmas collectables are under Collect → Dispensers → Beesmas. See Beesmas collectables. Memory Match is a separate Collect page. See Memory match.
Troubleshooting
Section titled “Troubleshooting”Ant pass full but macro keeps retrying the dispenser
Section titled “Ant pass full but macro keeps retrying the dispenser”Cause: Status shows Max Passes Detected when your Ant Pass inventory is full. Ant Pass collection disables for the rest of the session after that message.
Fix:
- Do not expect endless Ant Pass dispenser retries to start Ant Challenge. That quest path is separate from the dispenser toggle.
- If you need Ant Challenge passes, use the quest buy path in Automate quests.
- Restart the macro in a new session if you want Ant Pass collection to try again after passes are spent.
Wealth Clock never runs in the first hour
Section titled “Wealth Clock never runs in the first hour”Cause: Wealth Clock waits until about one hour has passed since you joined the server before the first trip.
Fix:
- Open Collect → Dispensers → Passes and confirm Wealth Clock is on.
- Leave the macro running for about one hour after join before expecting the first Wealth Clock status line.
- After the first collect, Wealth Clock can run again about every hour since the last collection.
Dispenser Collection Failed, timed out, or on cooldown
Section titled “Dispenser Collection Failed, timed out, or on cooldown”Cause: Status shows Dispenser Collection Failed when the macro reaches the dispenser but the collect does not complete.
Fix:
- Wait for the in-game dispenser cooldown, then let the macro retry on its schedule.
- If Status shows
Dispenser Collection Timed OutorShop Interaction Detected, clear any shop or UI prompt blocking the dispenser. - After more than two failed collections for the same dispenser, that timed collection stays unavailable until you restart the macro session or clear dispenser failure state.
- For Sticker Printer, a missed confirm can log
Failed to detect Sticker Printer confirm buttonand wait about one hour before retry.
More help
- Automate quests: Ant Pass shop and Ant Challenge quest path
- Beesmas collectables: seasonal Beesmas switches and Honey Wreath
- Memory match: Memory Match setup and loot options