
Gather settings for Bee Swarm Simulator
You can find your Gather Settings at Gather → Gather Settings. These settings decide how the macro gathers in a field, when it can take a conversion trip, and which sprinkler it places.
Where to find Gather Settings
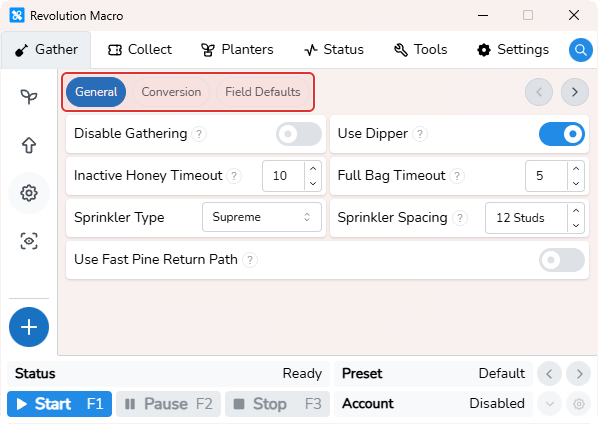
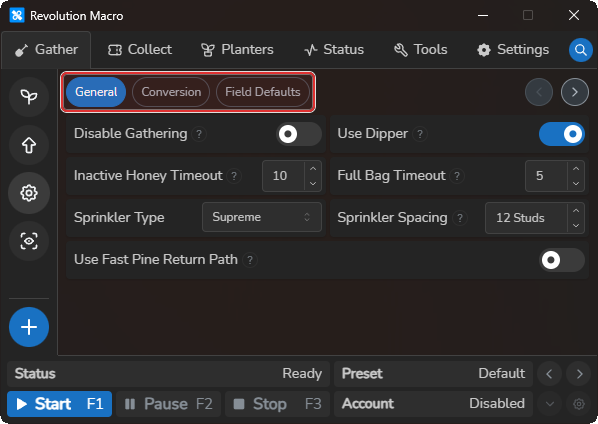
Section titled “Where to find Gather Settings”Open Gather and click Gather Settings. The breadcrumb reads Gather → Gather Settings, with tabs General, Conversion, and Field Defaults.
Convert settings
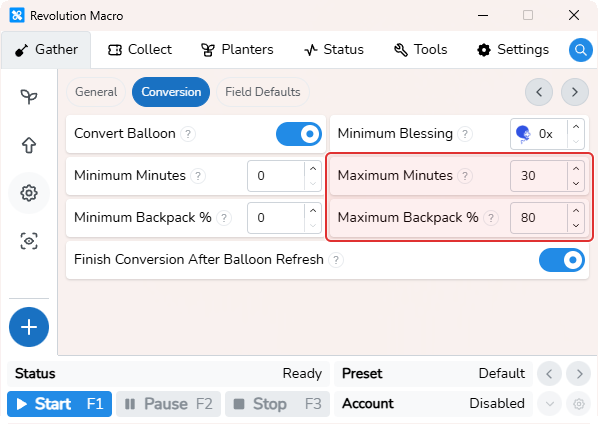
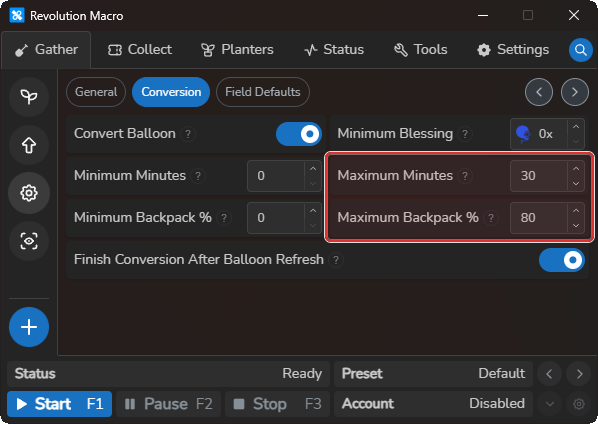
Section titled “Convert settings”Open Conversion for the settings that decide when the macro can make a conversion trip. After every gather ends, the macro returns to your hive and converts. That return happens regardless of the Conversion settings.
While the macro is doing other tasks, these settings decide when it can go back to the hive and convert. They do not end an active gather or tell the macro to leave a field. Field pattern Seconds, a full backpack, and inactive-honey exits decide when gathering stops. You can change field timing and per-field Max Backpack on Choose fields and patterns.
Convert Balloon
Section titled “Convert Balloon”Default on. With it on, a pending balloon blessing check can let the macro convert. Turn it off if you want conversion to depend on the backpack and time settings instead.
Minimum Minutes
Section titled “Minimum Minutes”Default 0. Delays time- and blessing-based conversion after a trip to the hive. A full backpack or Maximum Backpack % can still send the macro back sooner.
Maximum Minutes
Section titled “Maximum Minutes”Default 30. At a non-zero value, the macro can convert after that many minutes since the last convert, when your backpack is above Minimum Backpack % or a blessing is present. Set it to 0 only to turn off this time-based conversion rule. The macro still returns and converts after gathering, and its other conversion rules still apply.
Minimum Backpack %
Section titled “Minimum Backpack %”Works with Maximum Minutes. It sets how full your backpack must be before the elapsed-time rule can send the macro to the hive, unless a blessing is present.
Maximum Backpack %
Section titled “Maximum Backpack %”Default 80. At a non-zero value, the macro can convert when your backpack reaches that percentage. This is separate from the per-field Max Backpack setting, which helps decide when gathering ends.
Minimum Blessing
Section titled “Minimum Blessing”Default 0. Lets a balloon blessing send the macro back to the hive after it reaches the value you set. Leave it at 0 unless you want to wait for a target blessing.
Finish Conversion After Balloon Refresh
Section titled “Finish Conversion After Balloon Refresh”Default on. When the macro finds a balloon blessing refresh while converting, it stops converting then. Turn it off only if you want conversion to continue past that refresh.
General settings
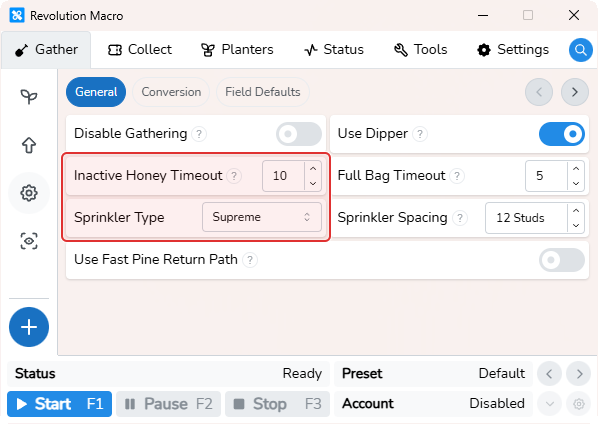
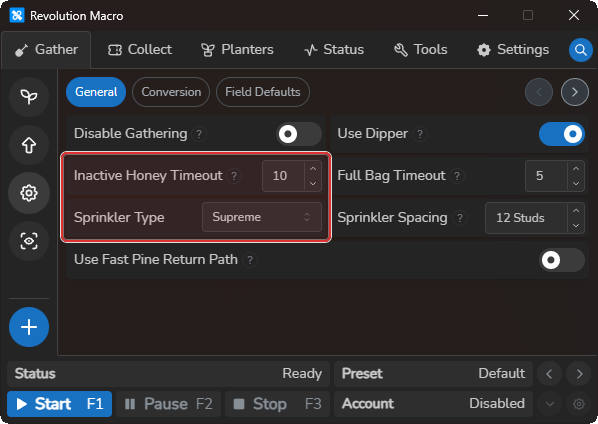
Section titled “General settings”On General, match Sprinkler Type to what you equip in-game. This tab also has the gathering timeouts, Use Dipper, Disable Gathering, and Use Fast Pine Return Path.
Sprinkler Type
Section titled “Sprinkler Type”Must match your in-game sprinkler. Default Supreme. AI Gather and bloom collection need a real sprinkler (Supreme for bloom quests). Options are None, Supreme, Diamond, Golden, Silver, and Basic. None or empty with AI Gather can show Sprinkler Required.
Sprinkler Spacing
Section titled “Sprinkler Spacing”Default 12. Change it only if Diamond, Golden, or Silver sprinkler placement looks wrong in the field.
Disable Gathering
Section titled “Disable Gathering”Default off. When on, the macro does not travel to fields for normal honey farming between other tasks.
Use Dipper
Section titled “Use Dipper”Default on. Holds the gather tool click at window center while gathering.
Inactive Honey Timeout
Section titled “Inactive Honey Timeout”The number of seconds without honey before gathering stops. Default 10.
Full Bag Timeout
Section titled “Full Bag Timeout”Default 5. To change when gathering leaves the field, use Inactive Honey Timeout and the per-field Max Backpack setting on Gather → Fields.
Use Fast Pine Return Path
Section titled “Use Fast Pine Return Path”When on and gathering ends at Pine Tree, the macro returns through the blue cannon. Leave it off if that route is inconsistent on your PC.
AI Gather
Section titled “AI Gather”Hive color, model FPS, overlay, and token settings when a field pattern is AI Gather. See Set up AI Gather.
Field defaults
Section titled “Field defaults”Open Field Defaults to set the pattern-card defaults used when you add a field. For field patterns and per-field settings, see Choose fields and patterns. For AI Gather settings, see Set up AI Gather.
Troubleshooting
Section titled “Troubleshooting”If the macro resets, gets stuck, or returns to the wrong place after gathering, see Macro resets or gets stuck. If the macro cannot read the game screen, see Detection problems.