
Capture and diagnostics in Revolution Macro
You can find capture and diagnostic settings under Settings → Macro on the Capture, Diagnostics, and Misc tabs. Leave Capture Mode on Default unless capture fails or Support asks you to try another method.
Change Capture Mode
Section titled “Change Capture Mode”On Windows, leave Capture Mode on Default unless capture fails or Support asks you to try another screenshot method.
-
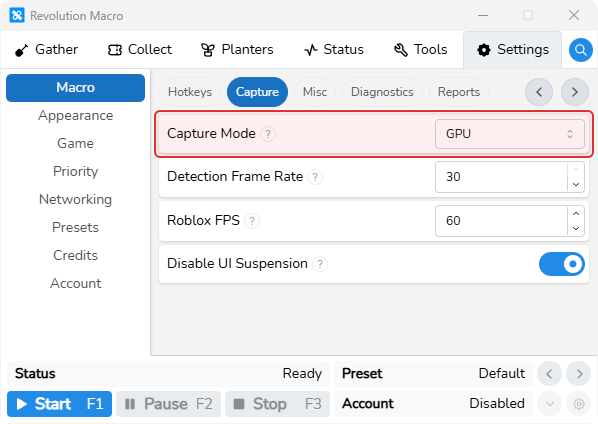
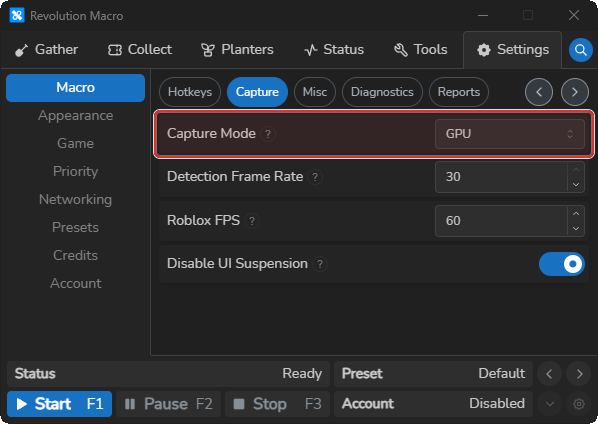
Open Settings → Macro → Capture.
You see Capture Mode, Detection Frame Rate, Roblox FPS, and Disable UI Suspension.
-
If capture still fails, change Capture Mode from Default to Window, GPU, Legacy, or Legacy Monitor.
A Change Capture Mode confirmation warns about unexpected problems. The warning notes that Window or Legacy modes capture the game window directly and allow always-on-top.
-
Click Proceed.
The chosen capture mode stays selected under Settings → Macro → Capture.
When status sticks on game loading
Section titled “When status sticks on game loading”Changing UI Offset Consensus or Custom UI Offset is a last resort. First work through Detection problems and Roblox launcher loops if Status sticks on game loading or Roblox fails to open or load. Follow every step on those pages before you change any Diagnostics offset setting.
If Status still stays on game loading during UI offset detection after that, lower UI Offset Consensus before you touch Custom UI Offset.
-
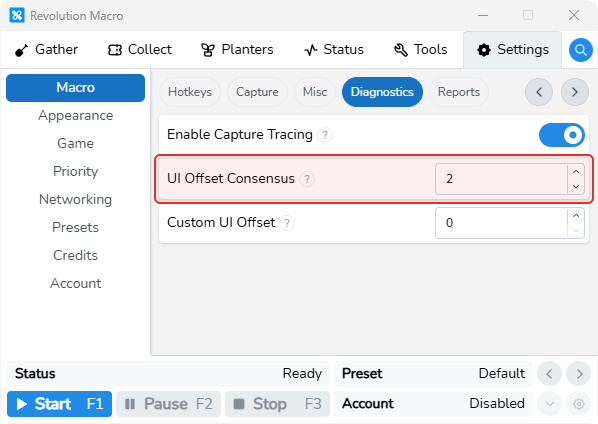
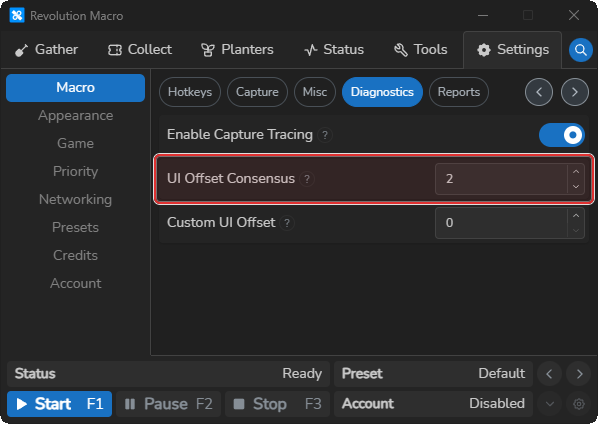
Open Settings → Macro → Diagnostics.
You see Enable Capture Tracing, UI Offset Consensus, and Custom UI Offset.
-
Set UI Offset Consensus to 1.
The number input shows 1.
-
Restart the macro or rejoin so offset detection runs again.
Status should progress past game loading if consensus was the blocker.
Leave Custom UI Offset at 0 for automatic detection. Only after you have finished those troubleshooting guides and followed every step, if you still need a manual Y offset, try 63 on macOS or 35 on Windows or Linux. Use a different value only when Support gives you one.
If Status shows Game Load Timeout Exceeded, raise Load Timeout under Settings → Macro → Misc using the Fix on Roblox launcher loops.
If startup still fails with Failed To Find Window or Failed To Capture Game Window, revisit Capture Mode on Windows, or leave Disable Virtual Monitor off and set Virtual Monitor Resolution on macOS.
macOS virtual monitor
Section titled “macOS virtual monitor”Revolution reads Roblox from screenshots. On a Retina Mac, the built-in display renders at expanded high resolution (more pixels in the same physical space), so Roblox screenshots come back at a scale the macro does not expect and the macro’s detections can fail. You need a way to run Roblox outside of that Retina resolution: on a display that is not Retina-scaled, or with Enable Low DPI Patching so the game window renders at a lower DPI on your built-in screen.
Leave Disable Virtual Monitor off (the default). When you start the macro on a Mac with only a Retina built-in display, Revolution creates Revolution Macro (Virtual Display) and moves Roblox onto it at your Virtual Monitor Resolution. That virtual display behaves like a separate non-Retina monitor, so screenshots show UI at the resolution the macro expects instead of Retina’s expanded high resolution. Prefer 1920x1080 for detection quality. 1600x900 and 1366x768 also work. 1366x768 is the minimum supported floor with upscaling, but can also improve performance and resource usage.
If you already have an external non-Retina monitor or DeskPad, turn on Disable Virtual Monitor and run Roblox on that display instead of letting the macro create one.
-
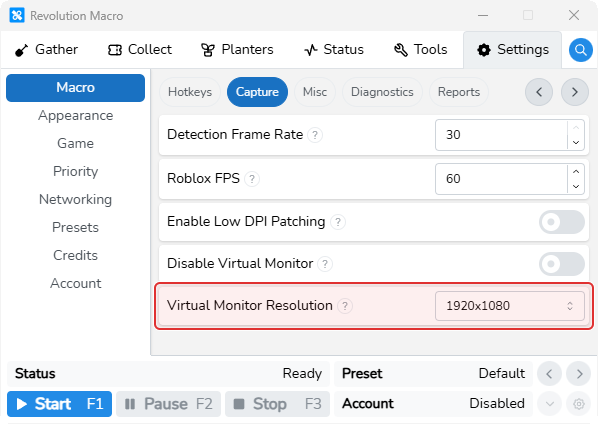
Open Settings → Macro → Capture.
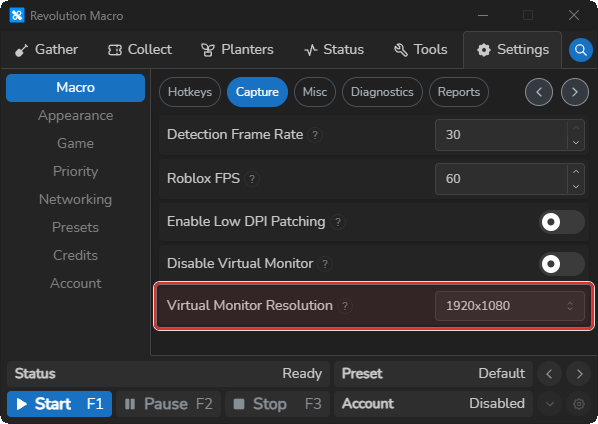
You see Enable Low DPI Patching, Disable Virtual Monitor, and Virtual Monitor Resolution.
-
Leave Disable Virtual Monitor off and leave Enable Low DPI Patching off so the macro can create a virtual display when you start it.
-
Set Virtual Monitor Resolution.
Prefer 1920x1080. Use 1600x900 or 1366x768 only if you need a smaller virtual display.
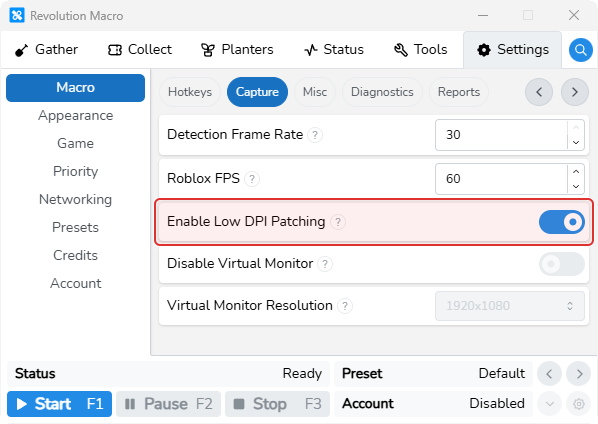
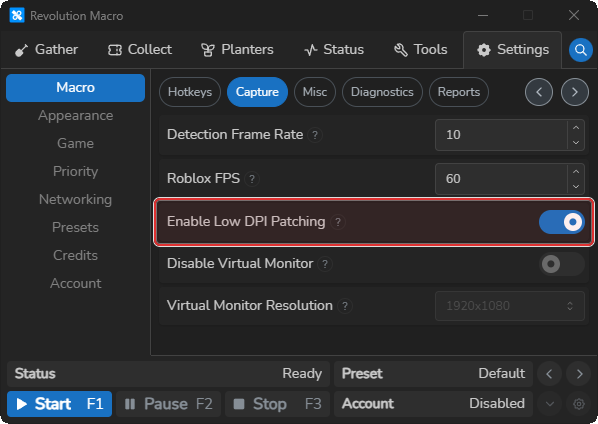
Turn on Enable Low DPI Patching when you want Roblox to stay on your built-in Retina screen instead of moving to a virtual display. On the next Roblox open, the macro patches the game to render a lower-resolution window so capture can read the UI at a scale it expects. Graphics may look blurry.
-
Open Settings → Macro → Capture.
-
Turn on Enable Low DPI Patching.
If Disable Virtual Monitor is on and no non-Retina display exists, Status can show A non-retina display could not be found. Attach a monitor or install DeskPad to add a virtual monitor. Attach a monitor or install DeskPad, or turn Disable Virtual Monitor off. For DeskPad modals and permission grants, see Install and permission problems.
More settings
Section titled “More settings”Capture Mode
Section titled “Capture Mode”Windows only. Leave on Default unless capture fails or Support asks you to try another screenshot method. When you pick Window, GPU, Legacy, or Legacy Monitor, the macro asks you to confirm the Change Capture Mode warning. Window and Legacy capture the game window directly and allow always-on-top.
Detection Frame Rate
Section titled “Detection Frame Rate”How often the macro checks buffs, backpack, and health (default 10). Lower values may reduce CPU during long sessions.
Roblox FPS
Section titled “Roblox FPS”The macro caps Roblox FPS when the game opens (default 60). At 30 FPS or below, the macro keeps Use High Alignment on. Close Roblox before changing for a clean apply.
Disable UI Suspension
Section titled “Disable UI Suspension”Windows only. When on, the macro UI keeps running when focus changes. Leave off (default) so the macro pauses its UI and reduces CPU while it runs.
Enable Low DPI Patching
Section titled “Enable Low DPI Patching”macOS only. When on, the macro patches Roblox to a lower-resolution window on the next open so capture can read the UI on a built-in Retina screen without creating a virtual display. Graphics may look blurry. Leave off unless you want Roblox to stay on the built-in screen.
Disable Virtual Monitor
Section titled “Disable Virtual Monitor”macOS only. When off (default), the macro creates Revolution Macro (Virtual Display) on Retina-only Macs and moves Roblox there at Virtual Monitor Resolution. Turn on only when you already run Roblox on an external non-Retina monitor or DeskPad and do not want the macro to create a virtual display.
Virtual Monitor Resolution
Section titled “Virtual Monitor Resolution”macOS only. Resolution of Revolution Macro (Virtual Display) when the macro creates one (default 1920x1080, also 1600x900 and 1366x768). Prefer 1920x1080 for detection quality. 1366x768 is the minimum supported floor with upscaling and can also improve performance and resource usage.
Enable Capture Tracing
Section titled “Enable Capture Tracing”When on, the macro records capture diagnostics for Revolution Macro Support. Turn on only when Support asks, then turn it off after you send logs.
UI Offset Consensus
Section titled “UI Offset Consensus”Default 2. Changing this is a last resort. Finish Detection problems and Roblox launcher loops first and follow every step. Only then try 1 if Status still stays on game loading during UI offset detection.
Custom UI Offset
Section titled “Custom UI Offset”Default 0 for automatic detection. Changing this is a last resort. Finish Detection problems and Roblox launcher loops first and follow every step. Only then, if you still need a manual Y offset, try 63 on macOS or 35 on Windows or Linux. Use a Support-provided value when they give you one.
Load Timeout
Section titled “Load Timeout”How long the macro waits during game load before aborting (default 30 seconds). Status can show Game Load Timeout Exceeded. Try 60 on slower PCs when game load is slow.
When related symptoms appear
Section titled “When related symptoms appear”If capture or detection still fails after these settings, work through the troubleshooting guides under Related before you change Capture Mode, UI Offset Consensus, or Custom UI Offset again.